CONTENTS
T3.3 WORKPLACE HEALTH AND SAFETY
T3.5 GETTING THE BEST FROM YOUR iPHONE
T3.1 INTRODUCTION
General
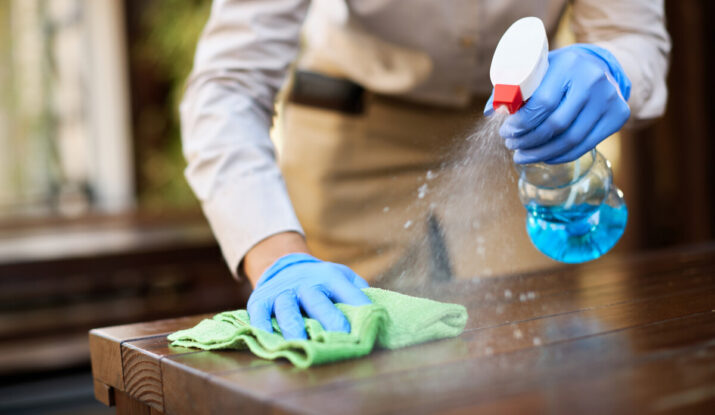
This training document covers the important tasks that need to be understood and applied by independent contractors in order to become part of the Fenix Team and to behave in a way that is appropriate to the successful future of the business. It forms part of the initial training which introduces new staff to Fenix.
Where this document is the Fenix single source of truth it will be so stated otherwise appropriate reference(s) will be provided.
Overview of Fenix Training
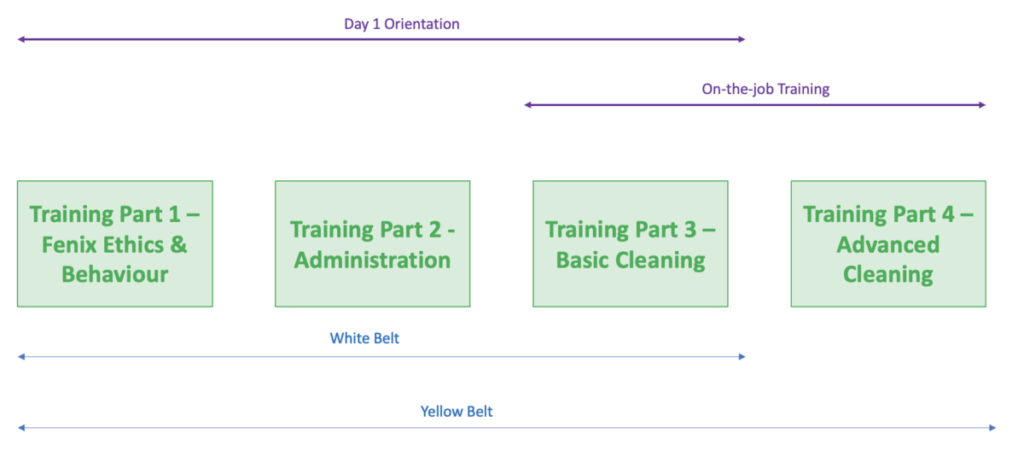
Training Parts 1, 2 and 3 will be covered in detail during the face-to-face training day. Training Parts 3 and 4 will require considerable addition work to be carried out by each IC in their own time.
To successfully complete this document and receive recognition accordingly, a small quiz will need to be completed at the end of the training item. In addition, a practical demonstration of certain skills and capabilities, as well as face to face question and answer may also form part of the assessment.
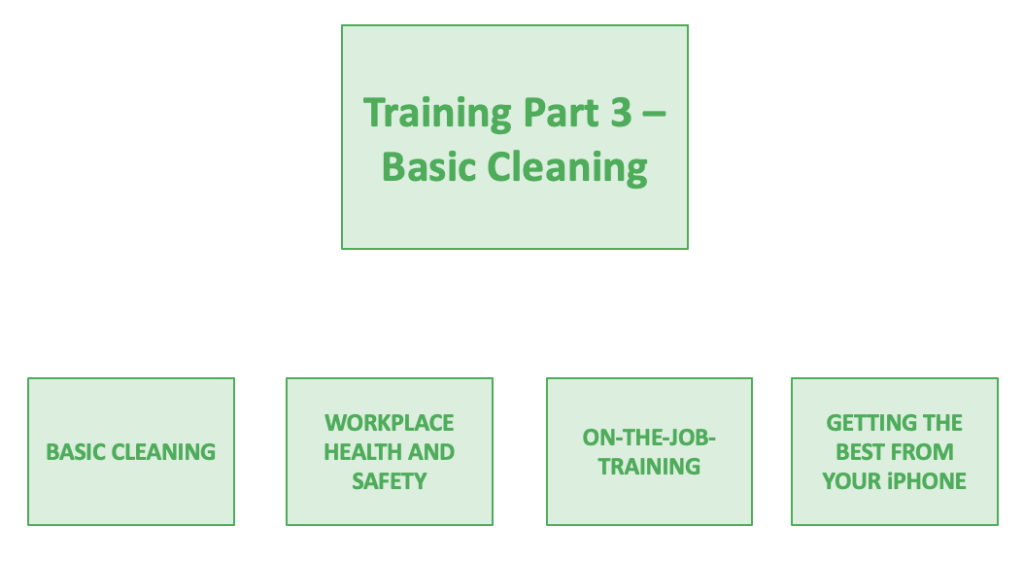
Overview of Training Part 3 – Basic Cleaning
Fenix training comprises four main sections, as shown in the figure below. This part, Part 3 – Basic Cleaning is a key part of the training and is intended to define the way in which an IC consistently delivers a high-quality outcome with a minimum requirement for involvement or intervention from the Fenix management team. This outcome should be consistently of such a quality that the IC feels contented, Fenix management is barely aware of the job and all requisite information has been supplied, the client, customer, tenant, agent and /or owner is very pleased and happy to provide a positive review.
After this part of the training has been completed in full, a newbie IC will become a white belt IC and rewarded accordingly.
Terminology Used in this Document
| Term | Meaning |
| AM | Administration manager |
| Cleaning Company | An organisation which provides cleaning services to customers |
| Client | A customer with whom Fenix has an ongoing mutually rewarding relationship |
| Customer | An end-user (individual or organisation) that employs the services of a cleaning company |
| Fenix | Fenix Property Solutions Pty Ltd ATF The Fenix Unit Trust TA Fenix Melbourne AKA Fenix |
| IC | A Fenix staff member who has executed an Independent Contractor Agreement, is working for Fenix under the x% arrangement and has supplied an ABN and other legal requirements |
| ICA | Independent Contractor Agreement |
| Job | A job is an agreed contract of work between a customer or client and a cleaning company |
| Service | A service provides benefit to a user because it adds value to the user in an intangible way, such as teaching someone thus increasing their knowledge or assisting them manage and improve their legal, financial, or medical situation |
| SM8 | Service Mate is Fenix’ operation support system (OSS) which is used primarily for quoting, invoicing, scheduling and asset management |
| Staff | A person who works for Fenix including employees, independent contractors, owners and anyone else who exchanges their sills and time for income |
| Tools | Any physical item that is used to achieve a goal but is not consumed during this process can be defined as a tool |
Table 1 – Terminology
T3.2 BASIC CLEANING
Maintaining and Storing Equipment
In order to keep manual and electrical equipment and tools functional, it is important to put tools in containers that maintain the tool in optimal working condition. Electrical equipment must also be carried safely taking into account the risk of damage from water, chemicals, other tools or the mishandling of cables and terminals.
It is important to keep in mind that it is more than good habit, it’s essential, to organising equipment and tools before each workday. All the tools required to carry out the day’s tasks should be checked and packed into your vehicle.
In addition, quick equipment maintenance check is required, such as emptying and cleaning vacuum filters, checking and replacing squeegee rubbers or blades and so on.
Organising Equipment at the Job
As members of a professional cleaning company, it is essential that all team members maintain consistent behaviors in the workplace. One of the most critical practices is the proper organization of all equipment used during a job.
A key principle to follow is “Tidy Stuff”—this means that all cleaning tools and materials should be placed in a central, secure location, away from potential hazards such as carpets, delicate surfaces, or walkways. Equipment should be arranged neatly to ensure easy access, reduce time spent searching for items, and minimize stress during the cleaning process.
Proper organization at the start of a job sets the tone for a smooth and efficient workflow. Moreover, it reflects the professionalism of the team to others who may observe the work environment, such as clients, real estate agents, or tenants. A well-organized setup enhances the credibility and reputation of both the individual team and the company as a whole. Always remember: the more professional your presentation, the stronger the impression you make.
Basic Cleaning
Video 1 – General Cleaning
General Cleaning
Cleaning Bucket – the following need to be included in the cleaning bucket: dishwashing liquid, window cleaner, a little ammonia (if house is dirty) and Jiff is an optional but very useful item to be included.
Items to be Cleaned – The following items need to be cleaned with a clean cloth and the general cleaning bucket when required: all window ledges, cupboards, drawers, surfaces, and switches.
Special Note – it’s recommended a separate cloth is used for skirtings and cupboard tracks because the cloth gets quite dirty during the process.

Always start from top to bottom in all of your cleaning (there is no point cleaning the skirting boards and then dusting over the top of them and have to clean them again).
Always start at the back of the house and move forward, focussing firstly on carpeted areas if another IC is going to be doing the steam cleaning for you.
Please be aware of anything that is damaged and don’t forget to take a photo and report in the damage in SM8 on arrival. If it’s significant damage call it through to your supervisor as well. We don’t touch damaged items thus avoiding the risk any further damage.
High Cleaning (where a ladder is required)
Fans – clean the blades and top of the fan very carefully not to put too much weight on the fan. Usually dusting of this is the best and most efficient way to clean these passing a cloth quickly over afterwards. If the fan is greasy or has stains often this is the bottom of the fan facing the ground and can be cleaned with a wet cloth and a magic sponge.
Cobwebs – it is important to walk around the whole room to check all corners of the room as at some angles and some light conditions you may not be able to see the cobwebs from a stationary position. Whilst doing the cobwebs, remember to dust the top of door and window frames and also check cobwebs inside the wardrobe.
Blinds – unless a specific request is made by the client the blinds will only be common-sense dusted. We use a duster or a cloth. Clean top to bottom then turn the blinds the other way and clean top to bottom again, removing all the dust. It is important in a vacate clean to ensure blind rails cleaned on both sides with a clean cloth. REA’s are all over this if we forget to do this.
If the blinds are greasy or really dirty this is an extra service and must be offered/discussed with the client on arrival of the job.
High Cupboards – This step is very important to do while you are managing the high things and already have the ladder in place.
Front Porch/Garage/Alfresco
Video 2 – Front Porch and Alfresco Cleaning
Use the same process described above for general cleaning, for outside areas.
Sweep/wash floors where required (some jobs get a much better result in a better time to give a wash down of the area rather than just a sweep).
Ensure all cobwebs are comprehensively cleaned outside.
Balconies and Alcoves
Cleaning alcoves and balconies involves a combination of dusting, removing cobwebs, and wiping down common surfaces and floors. Below is a general guide that aligns closely with standard cleaning procedures:
- Begin by dusting and removing cobwebs from ceilings, corners, and walls.
- Wipe down all surfaces, including shelves, rails, and any other dusty areas.
- Ensure that any debris or dust collected on the floor is gathered and disposed of properly.
- Depending on the surface of the balcony floor, mopping may be appropriate. However, if the surface is too rough, a thorough vacuuming should suffice.
- For balconies with glass panels or doors, it is advisable to check the condition of the internal glass and clean as needed. Please remember: clean the inside when necessary and clean the outside only if it is safe and reachable. Never attempt to clean exterior glass in a way that could put yourself or others at risk.
Vacuuming
Before you start work, pick up any rubbish or larger debris. These will clog and possible damage the vacuum cleaner and certainly obstruct the vacuuming task which will make your job much more difficult and unnecessarily time consuming. Please note, while you’re vacuuming, if you notice anything large or heavy just put it in your pocket until you finish the task (don’t suck It up).
Ensure you take good care of the vacuum cleaner and empty after it every use. Full vacuum cleaners will work poorly and take you twice as long to complete a professional job. Also you risk a blown-up vacuum cleaner which will waste your money.
Have a process to your vacuuming so you make sure you cover all the required areas; back to the front, line by line is the best way to do it.
Pull the vacuum backward, overlapping the previous pass slightly. Repeat this forward-and-backward motion, covering the entire area. It’s essential to be thorough, so make multiple passes over heavily soiled or high-traffic areas.
Towards the end of the task, take off the head of the vacuum cleaner wand and using the open tube, clean all the edges of the room, importantly behind the door and inside cupboards.
Mopping
Mopping can be carried out only after vacuuming has been completed.
Never, I repeat never mop without a cloth – it’s just not professional.
The final stage of the mopping will vary depending on the type of floor, but the first few steps are always the same.
Mop around the edges first, then much like the vacuum process have a systematic way to cover the while floor. If you are mopping haphazardly, is very obvious on most floors when it dries. The result is a poor one.
Where possible always make sure you use clean hot water and avoid using chemicals and products where you can.
Change water regularly to maintain high standards of cleanliness.
Work out if your final mop will be with a traditional mop or a water fed flat mop (sometimes it needs to be both).
Which way is the mop going to finish to leave the best result? Again depending on the floor you need to work this out before starting the final mop?
For Tiles – firstly mop all edges then with a traditional mop pass over all the floor (cloth in hand, scourer sometimes too if the floor has sticky/chewy/dirty marks) afterwards use a flat mop if required when the floor looks streaky.
Wooden Floors – firstly mop all edges making sure you mop with the grain, if you mop the opposite direction the final delivery looks unattractive.
Usually the traditional mop leave a better finish on most wooden floors (cloth in hand, magic sponge sometimes too if the floor has sticky/chewy/dirty marks) don’t use a scourer
Marble Floors – firstly mop all edges with a traditional mop passing over all the floor (cloth in hand, magic sponge sometimes too if the floor has sticky/chewy/dirty marks). Always flat mop afterwards.
With marble floors make sure you don’t get the floor too wet.
Kitchen
Introduction
View the following video to see the process of Kitchen Cleaning in progress.
Video 3 – Kitchen Cleaning
Assess and Prepare
Evaluate the kitchen by inspecting and photographing critical elements such as appliances, range hood, stove top, oven, and bench tops. Document any existing damage or stains. Prepare your equipment, chemicals, and tools before proceeding.
Applying Chemicals
Carefully assess potential risks associated with using strong chemicals in the kitchen. Always apply oven cleaner and similar chemicals to stainless steel surfaces. If unsure whether a surface is stainless steel, avoid using harsh chemicals to prevent irreversible damage to plastic knobs, painted areas, and non-stainless metal parts. Wear PPE when applying chemicals and prepare for the next steps.
Cabinetry
Dust high corners and surfaces to remove cobwebs and dust before cleaning the cabinetry. Use appropriate, safe chemicals or detergents for different materials. Magic erasers can help remove stains but should be avoided on glossy surfaces to prevent patching. Clean from top to bottom and side to side, ensuring all drawers and shelves are addressed. For greasy cabinetry, use detergent with hot water, rinse, and follow with a clean, dry cloth. Clean the sink area last, as it is frequently used during the cleaning process. Finish by wiping the outside surfaces with a dry cloth and detergent to ensure a polished appearance.
Appliances
Use hot water to help remove grime and oil from ovens, stoves, grills, and hot plates. A stainless-steel scourer can be useful but avoid excessive scrubbing to prevent damage. Clean from top to bottom (range hood, stove, oven) according to the kitchen’s layout. Rinse off chemicals with water, and safely place cleaned parts of the oven, range hood, or stove aside. Ensure they are dry before reinstalling. For oven glass, use a glass cleaner instead of a scourer. Reinstall and check the glass for cleanliness.
Check and Complete Details
Thoroughly inspect the kitchen for any remaining dirt or issues. Ensure the splash back is clean, open all drawers to check, and check kickboards for inspection. Use a dry cloth to polish all metal surfaces, ensuring they are shiny and clean. Verify that benches are free from dust and sticky particles. Use a magic eraser to clean the sink and sink basket waste, removing any small crumbs or dirt.
Oven Cleaning
Introduction
| Equipment Required | Chemicals Required | Warnings | Prerequisites |
| Scourers, scraper, brush, gloves, screwdrivers (flat head and Phillips head), and microfibre cloth | Oven cleaner, degreaser, dishwashing liquid, window cleaner, ammonia, and Jif crème | Spraying oven cleaning on any other surface other than oven as it causes serious damage to benches, floors, cupboards, stove tops, etc. | Is it a deep oven clean or a wipe-over oven clean, as the process will be different for each |
Table 2– Oven Cleaning
View the following video to see the process of Oven Cleaning in progress.
Video 4 – Oven Cleaning
Cleaning Procedure
Identify whether the oven needs a deep clean or a superficial wipe-over clean.
(Please note this should be done when checking the quote in case you need to have a conversation with the client and/or make an adjustment to the quote.)
Wipe-over Clean
Step 1 – prepare bucket of hot water dishwashing liquid ammonia and window cleaner
Step 2 – remove the racks if necessary and give a quick once-over with the scourer of the side, bottom and back of the oven – place the clean racks in the sink and put straight back in the oven
Step 3 – clean the oven tray, you may need to use a little bit of oven cleaner on the tray (or base of the oven) even in a wipe-over but it’s not necessary to leave it soaking for a long time
Step 4 – clean the oven glass inside, outside and in-between, make sure to clean the track in-between the door and the oven
Deep Clean
Step 1 – put on a mask and gloves
Step 2 – remove all oven racks and any other removable components and spray oven cleaner on them – this is normally best done in the sink (be very careful not to get oven cleaner on the bench or cupboards) – then apply the oven cleaner inside the oven, covering the oven walls, base and racks. If you’re using a spray, give it a good, even coating – ideally leave this soaking for about an hour when possible, while you do other things
Step 3 – remove the racks and clean off the oven cleaner with a scourer in the sink – when clean leave neatly on the kitchen bench on a large cloth to dry out
Step 4 – prepare a bucket of hot water dishwashing liquid ammonia and window cleaner – use this to clean the oven cleaner off the sides, back and base of the oven – once it’s been thoroughly cleaned wipe out with a dry cloth
Step 5 – clean oven glass door and in between oven glass (you can also use a scourer on the oven glass) and with a dry cloth and window cleaner spray wipe over for a great finish
Step 6 – put the racks and tray back in the oven and clean the front and top of the oven to finalise the task
Range Hood Cleaning
| Equipment Required | Chemicals Required | Warnings | Prerequisites |
| Scourers, soft bristled brush, hard bristled scrubbing brush, gloves, cloths | Oven cleaner, degreaser, dishwashing liquid, window cleaner ammonia, Jif crème | Spraying oven cleaner on any other surfaces as it will cause damage to most surfaces |
Table 3 – Range Hood Cleaning
Step 1 – start by removing obvious dust or cobwebs (before you start dusting you should make sure that you lay cloth or a towel over your stove to capture any dirt or debris that falls whilst you are dusting)
Step 2 – then you should use a soft bristled dust brush to remove dusty and dry particles from the surface of your range hood – inside and out
Step 3 – the next step is to remove the range hood filter/s so that you can start the de-greasing process
Step 4 – to clean the range hood filters, soak them in a in the sink filled with hot water and a mixture of degreaser and oven cleaner if they are in bad condition – leave the greasy filters in the sink or bucket to soak for at least 10 minutes – the longer the better
Step 5 – after you have left the filters to soak for a suitable period, you will need to give them a good scrubbing – this may require you adding more degreaser and some more hot water – make sure you are careful when scrubbing the filters as they can have sharp edges
Step 6 – wipe down the outside of the range hood, if it’s not too greasy then you can use window cleaner with a microfibre cloth – if it is greasy, the same soaking process is used (except never use oven cleaner at this stage)
Step 7 – put the filters back in position and the job is complete
If you have areas of real concern where it’s hard to get rid of grease, another option you have up your sleeve is to make a paste out of baking soda and warm water. This paste can help break down grease stuck in hard to scrub areas. If you leave this paste there for about 30 minutes to an hour, you should then more easily be able to clean off any grease that was initially hard to remove.
Stove Cleaning
Introduction
| Equipment Required | Chemicals Required | Warnings | Prerequisites |
| Scourers, soft bristled brush, gloves, cloths | Oven cleaner, degreaser, dishwashing liquid, window cleaner ammonia, Jif crème | Spraying oven cleaner on any other surfaces as it cause damage to most surfaces |
Table 4 – Stove Cleaning
There are two types of stove tops commonly encountered and the cleaning procedure for each is slightly different.
Electric Stove Top
Electric stove tops are known for their smooth surface, which can be easier to clean than gas stoves.
Step 1 – before you clean a stove top that is electric, ensure that it is completely cool to avoid any burns or damage to the surface
Step 2 – if the electric stove has coils, carefully lift and unplug them – wipe the coils with a damp cloth, but never immerse them in water – for tough residue, use a mild cleanser and a soft brush, then allow them to dry completely before reattaching them
Step 3 – using a gentle kitchen cleaner or a mixture of degreaser and water, wipe down the surface of the stove top
Avoid using abrasive cleaners or pads that can scratch the surface
Step 4 – for areas with stubborn stains, use degreaser on the stain and gently scrub with a soft sponge
Step 5 – after you’ve finished scrubbing, take a clean, dry cloth with window cleaner on the surface of the stove top to remove any streaks and get a clean stove
Gas Stove Top
Step 1 – start by removing the grates and burner caps, these can usually be washed with hot, soapy water – for tougher grime, let them soak in the oven cleaner – dry them thoroughly before placing them back on the stove
Only use oven cleaner in the sink not on top of the stove to avoid any damage.
Step 2 – using a sponge or cloth, wipe down the surface of the gas stove top – as with the electric stove avoid scratching the surface
Step 3 – Ensure the burners are cool and wipe away any loose debris – for clogged burner holes, use a pin or a small wire to remove any blockages, ensuring a consistent flame
Step 4 – for areas with stubborn stains, use degreaser on the stain and gently scrub with a soft sponge
Step 5 – once you’ve finished cleaning, rinse the surface with a clean, take a clean, dry cloth with window cleaner on the surface of the stove top to remove any streaks and get a clean stove
Dishwasher Cleaning
Fully wipe out the appliance, including the front and the whole of the inside. Usually a cloth and a window cleaner is sufficient.
If it needs a deep clean use hot water with ammonia and dishwashing liquid. Always remember to clean the filter and the edges of the dishwasher.
Kitchen Benches
Wooden Bench Tops
Being a natural material, cleaning a wooden bench is something we need to be very careful with especially in regard to the use of chemicals.
Generally natural products and safer and get better results. Hot water and lemon juice are very effective ways to clean bench tops with low risk.
Stains on a wooden bench – ingredients used to remove those stubborn stains is a mixture of lemon juice and salt. This is a great natural solution.
Be careful not to get these benches too wet because excess water can damage or stain wooden benches.
Avoid vinegar on wooden countertops because the acid in it dissolves the glue holding the pieces together.
Keep a light bleach solution in a spray bottle to disinfect wood countertops (use very sparingly)
Marble Bench Tops
Being porous, marble can be damaged by acids, alkalis, and abrasive cleaners, on the positive side, it’s usually quite easy to clean. To remove grit and loose dust, wipe the surface with a clean cloth. Clean your marble surface using warm water and a micro-fibre cloth with window cleaner.
Spot-clean any marks, spills or stains using a pH neutral dishwashing liquid and ensure that the liquid is safe for marble. With stains you can careful use a magic sponge with bleach and try to remove stains, make sure immediately after you use hot water with a clean cloth to remove and remaining residue.
Be careful using hard brushes or scourers on this type of bench.
Avoid acidic natural cleaners like vinegar and lemon juice.
After spot cleaning, use clean water to rinse.
Laminate Bench Tops
Being the most common kitchen bench you’re likely to find in a kitchen renovation, laminate counters are easy to clean. Although laminate countertops stand up to a lot of spills and scratches, once damaged it becomes extra porous and will stain much easier.
To remove grease, streaks and spills, use a window cleaner or any of the general cleaning mixes, cleaners. Wipe the dirt away and rub the entire area using a dry microfiber cloth.
Stainless-Steel Bench Tops
For tougher smudge marks on a stainless-steel bench top, use a blend of baking soda and vinegar and scrub the bench top gently. Once rinsed clean, dry the countertop using a paper towel, dish towel or microfiber cloth in the grain direction.
For an added sheen, you can also apply a window cleaner or stainless-steel shiner.
Avoid abrasive scrubbing pads which can scratch the surface.
Engineered Stone Bench Tops
Question:
What should I use to clean engineered stone?
Answer:
Nothing fancy. Warm water and a soft, damp cloth with a small amount of mild, bleach-free, non-abrasive detergent, does the job for everyday cleaning. Make sure you clean up liquid spills (including fruits and veggies, food colouring and curries) as soon as possible with a damp cloth and a mild detergent, as their bright colours can tend to stain more easily.
Floors
Mopping a kitchen can be challenging. Pay attention to edges and gaps between appliances and floors. Vacuum and mop thoroughly, ensuring the entire kitchen floor is clean.
Blinds
As part of a standard vacate clean, all blinds and window coverings should be inspected and cleaned if necessary. It is important to note that there are various types of blinds, each requiring slightly different care:
- Roller Blinds: Gently pull the blind down and inspect both sides. Dust the top section where buildup is common, and wipe the bottom edge to remove any marks or dirt.
- Venetian Blinds: Available in various sizes and materials (often plastic or wood), these should be dusted thoroughly. Ensure both the top and bottom rails are clean. For larger wooden slats, it is recommended to individually wipe each slat. In kitchens or high-use areas, blinds may accumulate a layer of grease and dust. In these cases, apply a soft degreaser, allow it to sit for a few minutes, and then gently wipe clean.
- Vertical Blinds: Typically require minimal cleaning. Check for cobwebs and dust along the top track and between panels.
- Panel Glides: Inspect the top for cobwebs, clean the bottom rail (often a stick or bar), and check behind the panels for dust buildup.
- Blockout Blinds: These can be cleaned similarly to roller blinds or panel glides.
- Curtains: Lightly dust the surface and check behind for cobwebs or dust. Wipe or dust the top section with care, using tools that won’t damage the fabric or create holes.
In all cases, ensure that fittings are secure and that cleaning does not compromise the integrity of the installation. If any damage or looseness is observed, it should be reported immediately to avoid further issues or liability.
Bathroom
Assess and Prepare
First, assess the bathroom to identify any issues, damages, or challenges. Develop a plan to address any issues found. Remove items from the bathroom to clear the space, making it comfortable, clear, and safe. This may include removing fly screens, personal items, towels, glass containers, and other objects at risk. Set up your cleaning supplies and proceed to the next step.
Dusting
Once the bathroom is cleared, use dusters or cobweb removers to dust all surfaces from top to bottom, including fittings such as vents and lights. Ensure all horizontal surfaces, even the smallest ones, are dusted, along with corners, door frames, and window frames. Let the dust settle before proceeding.
Rinsing
Rinse the specific areas to be cleaned and apply appropriate chemicals. Use bleach for the toilet, glass cleaner for the inside surfaces of the shower, and suitable cleaners for the bathtub, basin, tiles, and grout.
Surface Cleaning
Begin cleaning surfaces according to your plan, starting with the easier items like vanity drawers and shelves and moving to more challenging areas to allow time for chemicals to work. Clean windows and mirrors at this stage as well.
Hard Scrub
Give special attention to the bathtub, shower glass, and tiles. Use a magic eraser, detergent, and cloths for scrubbing. Clean grout with a grout brush. Pay attention to small areas with soap scum and grime. After scrubbing the glass, use a professional window kit and a dry cloth to remove imperfections.
Toilet
Apply toilet cleaner inside the rim and bowl. Scrub with a toilet brush and flush. Spray an all-purpose cleaner on the rest of the toilet and wipe it with a clean cloth. Thoroughly clean and check the outside of the bowl, looking for hairs and cleaning the floor around the toilet.
A pumice stick is designed to make porcelain toilet bowls sparkle and effectively eliminate stubborn hard-water stains, mineral deposits, and other residues without causing any scratches on the surfaces of the appliances. The best way to scrub is using bleach in gel to make sure the surface is wet avoiding scratching the surface, it is always better to try in a hidden part of the surface to make sure the tool is safe to use in the situation.
Floors
Ensure the entire bathroom is clean and tidy before cleaning the floors. Check that metal fittings are clean and shiny, and all fittings, taps, and handles are spotless. Mop the floor thoroughly, paying attention to grout where necessary. Finish by spraying a recommended air freshener.
Tiles and Grout
Normally, tiles and grout are located in the shower and on the floors. To perform a thorough cleaning of these areas it is highly recommended firstly to pre-spray a bleach-based chemical and leave the pre-spray on the surface to soften the dirt.
Shower tiles and grout – after the pre-spray, there are two options depending on the two possible types of surfaces. For tiles, it is good to use magic eraser to remove all the grime and soap scum on the surface, sometimes semi-hard brush is worth a try. The grout can be cleaned by small brush and rinse, after the tile and grout are clean, it is necessary to get dry the surface with a dry cloth, checking all the corners inside of shower.
Floor tiles and grout – The tiles of the floor of the bathroom can be cleaned by pouring a disinfectant chemical for floors onto the grout and using a brush attached to a pole. Using up-and-down movements, scrub the surface of the grout, clean the surface of the tiles with a good mopping of the floor and carry out a final check.
Shower Screens
The shower screens are one of the most important items inside of the bathroom and is crucial to perform the cleaning of these in a good time and with very good quality.
The best way to clean a shower screen is to get a bucket of detergent and pour on the surface. Use a magic eraser to scrub all the surfaces of the glass especially on the bottom area. Use a professional window kit to perform a glass cleaning and check the spots not cleaned and again use the magic eraser if necessary. Lastly, repeat the clean of the glass and the small details of the glass can be fixed using a dry glass cloth.
Mirrors – the mirror can be clean very quickly and with good quality using the professional window kit, and as usual, checking and remaining blemishes with dry glass cloth.
View the following video to see the process of Bathroom cleaning in progress.
Video 5 – Bathroom Cleaning
Windows
Introduction
To ensure a professional and thorough approach to window cleaning during a vacate or end-of-lease cleaning, it’s important to follow structured steps that emphasise both efficiency and quality.
View the following video to see the process of Window Cleaning in progress.
Video 6 – Window Cleaning
Window Cleaning in Vacate Cleaning
Windows are a crucial part of vacate or end-of-lease cleaning. Though often overlooked, clean windows can make a significant difference in the overall appearance of the property. The process must be done efficiently while maintaining a high standard of cleanliness.
Initial Considerations
Scope of Work – typically, you’ll be required to clean the interior windows, with exterior windows cleaned only if they are easily accessible. Clarify this with the property manager or client before starting.
Inspection – before cleaning, inspect each window for any existing damage, such as cracks or loose panes. Document any issues with photos in SM8 as evidence. Avoid cleaning any windows that appear unsafe.
Cleaning Process
Interior Window Cleaning
- Preparation
- Gather your professional window cleaning kit, including warm water, a suitable cleaning agent (such as dishwashing liquid or ammonia), a washer, squeegee, and dry cloths
- Inspect and clean your equipment before starting
- If possible, remove fly screens to access the windows more easily and save time
- Cleaning Steps:
-
- Wash the Glass – use the washer to apply the cleaning solution across the entire glass surface, ensuring even coverage without applying too much pressure
- Wipe the Edges – use a dry, clean cloth to wipe away any excess water or solution from the edges (top, bottom, and sides) of the window
- Squeegee – use a squeegee to remove the water and cleaning solution, ensuring no streaks are left behind – begin at the top and work downwards in smooth, overlapping strokes
- Clean Sills and Tracks – after the glass is clean, wipe down the window-sills and tracks to remove any dirt or residue
- Reinstall Fly Screens – once the windows and frames are clean, replace any fly screens
Some tools helps to make this task nice and in short time, we need to identify which tracks needs to be clean, in the normal vacate cleaning is necessary to do the internal tracks without to open de door, the sliding door to check if the track is in good condition opening the door panel and clean the internal track with the door closed. https://melbournecleaningsupplies.com.au/brush-tile-grout-each/
Avoid using too much water in your washer to prevent dripping onto floors or carpets.
For small windows where a squeegee might not fit, use a clean cloth with window cleaner instead
Exterior Window Cleaning
- Water-Fed Pole System
-
- If accessible, use a water-fed pole with a brush to clean the windows. Move the brush in small, up-and-down motions to scrub the glass, then rinse with water.
- Professional Kit
-
- For sliding doors and other large windows, use the same professional window cleaning kit and techniques as used for interior windows
- Final Checks
-
- After cleaning, inspect the tracks and sills to ensure they are free of debris and watermarks
Professional Conduct
- Documentation– keep detailed notes of any damages found and provide this information to the client or property manager
- Safety– never compromise safety for efficiency, if a window is unsafe to clean, report it rather than attempting the task
By following these steps, you’ll ensure the windows are cleaned to a high standard, helping to secure the return of the tenant’s bond and leaving the property in top condition.
Fast Clean Versus Detailed
When it comes to window cleaning in an end-of-lease job, it typically doesn’t require a significant amount of time. This task is usually completed within 1.0 to 1.5 hours. The process usually starts with cleaning the exterior windows using a feedwater pole. Inside, attention is given only to windows that specifically need it.
On the other hand, detailed window cleaning, such as for pre-sale preparation or specific work orders, demands a much higher level of attention to detail. This type of job can take 3.0 to 4.0 or even more hours, depending on the number of windows and the challenges involved.
Detailed window cleaning involves ensuring the glass is spotless, no matter how many attempts it takes. The goal is to achieve a flawless finish, with no watermarks, spots, grease, or mould left behind. It’s essential to clean the tracks, frames, and sills thoroughly, and checking the glass from different angles after cleaning is crucial to avoid missing any imperfections.
Flyscreens
Cleaning of fly screens could be an easy task if you collect all of them to pressure wash it taking care of the fragile net, also could be possible to wipe it up by wet cloth removing dust and cobwebs, the most important part of the cleaning could be to remove and re install the frame, taking care of the frame and net, clips and fixation adds, avoiding to bend the frame or make any hole in the net surface.
Wall and Door
The cleaning of walls and doors during a vacate or any other type of service depends on the client’s expectations, which are typically aligned with the available time and budget. Generally, there are two approaches: spot cleaning and full wall cleaning.
- Spot Cleaning:
Prepare a bucket with hot water and sugar soap. Use a magic eraser and a microfiber cloth to gently clean marks or stains. When using the magic eraser, ensure it is well-squeezed to avoid excess moisture on floors. After each attempt to remove a mark, use the cloth in a single direction to smooth the surface and remove any remaining soap residue.
The level of detail may vary depending on the allocated time. It’s important to plan at the beginning of the job to ensure that all high-traffic areas and surfaces are addressed within the proposed timeframe. - Full Wall Cleaning:
This process is more time-consuming. Begin with a spot clean to address any prominent marks. Then, using the same sugar soap solution, clean the walls from top to bottom in a consistent direction to achieve an even finish. For efficiency, using a flat mop and microfiber cloth can be helpful, especially for covering large areas while maintaining a uniform appearance.
Regardless of the method, always aim to deliver a result that meets the client’s expectations while preserving the condition of the surfaces.
Stand Alone Deodorising
“As part of the cleaning service, deodorising helps to eliminate or neutralise unpleasant odors, leaving the space smelling fresh. It is especially useful after vacate cleans, pet-related cleaning, or if there’s been a buildup of moisture, food smells, or smoke. The method we use is safe and tailored to the surface and environment, ensuring no damage to furniture, fabrics, or flooring.”
Steps to Conduct Deodorizing During a Cleaning Job:
- Identify the Source of the Odor:
Before applying any product, check for and remove the source of the smell—e.g., food residue, pet accidents, damp areas, rubbish, or smoke build-up. - Clean the Affected Areas Thoroughly:
Deodorizing is most effective after a deep clean. Ensure all surfaces, especially floors, bins, carpets, upholstery, and air vents, are properly cleaned. - Select the Right Deodorizer:
Choose a product appropriate for the space and material—this may include:- Fabric-safe deodorizer for sofas, curtains, or carpets
- Disinfectant sprays with odor-neutralizing agents for hard surfaces
- Air fresheners or natural sprays for general areas
- Enzyme-based deodorizers for organic smells (e.g., urine or food waste)
- Apply Product Safely:
- Always follow manufacturer instructions.
- Test on a small area first if applying to fabric or carpet.
- Spray in sweeping motions from a reasonable distance to ensure even coverage.
- Do not over-saturate.
- Ventilate the Area:
Open windows and allow airflow to help the deodorizer settle and circulate. This also assists in drying and reduces chemical buildup. - Final Check:
Do a final inspection to ensure the odor is neutralized. Reapply only if necessary.
Avoid masking odors with strong perfumes—use neutralizing products that break down odor molecules rather than covering them up.
Basic Steam Cleaning
Introduction
Basic Steam Cleaning
Basic steam cleaning (SC) refers to the steam cleaning of carpet in fair to reasonable condition with possibly some light staining. The cleaning of heavily stained carpet is referred to as “heavy duty” steam cleaning (HDSC) and the steam cleaning of upholstery, mattresses and curtains, as well as emergency steam cleaning, fumigation and protection, is referred to as “specialist” steam cleaning (SSC).
This material is intended to address only SC, while HDSC and SSC will be covered in detail in Training Part 4 – Advanced Cleaning.
The Importance of Steam Cleaning a Carpet
Everybody knows how good it is to get a property clean and looking and smelling great; now we’re going to dive a little deeper into this important cleaning task. Firstly, we have to consider what is really happening when we steam clean and then examine the best practise process.
Carpet steam cleaning is the process of pressurising hot water to penetrate deep into the carpet fibres to help soften and loosen embedded dirt, dust, skin cells, stains, and most importantly kill germs, bacteria, and viruses. It also freshens and prolongs the life of your carpet – no more worrying about replacing the carpet prematurely because it’s looking old and worn.
When steam is forced into the carpet, the miniscule vapor molecules agitate the pores which cause the molecules to expand quickly and powerfully to expel all the nasty little things suspended in the fibres.
The Steam Cleaning Process
Please be aware… there are six important steps in the process of steam cleaning a carpet and we’re going to address each one in detail in the following sections. Parts of the following discussion can be somewhat technical but let’s try to work our way through it.
Step 1: Carry Out A Risk Assessment
Right off the bat, we complete a risk assessment and familiarisation with the site and the carpets therein. This can include making sure where all the exits, fire extinguishers, power supply, water supply, bathrooms, etc., are in the building.
Fenix steam cleaning technicians have been specifically trained to do this risk assessment, which is a point of difference with many other steam cleaners.
Steam cleaning of carpet takes skill, and a trained cleaning professional is the best choice to perform this work. A Fenix professional steam cleaner will, before performing a steam clean of a carpet, check the following items at the start:
- There is power supply and hot water available in the property
- The carpet is reachable with the equipment available
- The carpet area matches with the client’s requirements
- The carpet is already vacuumed, and the edges are clean
- The carpet doesn’t have pet hairs or visible particles of dust which can be removed by the vacuum process
- Check for permanent damages of the carpet or discoloration or strange items stuck on the carpet
- Take the before photos before starting
Step 2: Set-up Equipment
Prepare all the equipment and chemicals needed to complete the job.
Generally the items required include:
- Vacuum with power head
- Pre-spray equipment
- Chemicals
- Steam cleaning machine
- Hoses and connectors
- Wands
- Bucket
Step 3: Vacuum the Carpet
Before the hot water extraction process begins, Fenix steam cleaners need to pre-vacuum the carpet just to make sure any surface dirt is removed.
Whilst doing this, they’re also picking up any visible rubbish off the floors such as paper clips, pens, paper, cardboard, etc – anything that could get in the way of the job.
The important of the vacuuming is summed up in the following three points:
- So dirt doesn’t get pushed into the carpet any deeper when the machine is run over it.
- Removing as much dirt as possible before the extraction process.
- It will overall assist in delivering a better outcome
Step 4: Spraying and Treating the Stains
All of the stains / blemishes should be sprayed with a burst of safe chemical to loosen the stains. This is effective because the stained carpets receives significantly more time with the chemicals present, working to soften the stain before the extraction process.
Another critical part of Step 4 is to check if any chewing gum, blue tac stick or other unwanted mess is stuck on the surface of the carpet. The appropriate chemical to remove any of these types of messes are detailed below.
There are different kind of stains and there is a special chemical for each one, please refer to the section below to learn to treat stains with the right chemical.
Also remember, test in a safe section of the carpet and be ready to extract the chemical in case of undesired results.
Step 5: Pre-spraying
We’re almost at the final stage and here is where the exciting part of the carpet steam cleaning process starts. The carpet must be pre-sprayed with the chosen cleaning chemical – generally a non-solvent emulsifier for removal of general dirt and other soiling and is applicable for all carpets.
There is only one correct way to pre-spray a carpet and that’s to not let the chemical dry before it’s extracted. However, that doesn’t mean that you extract straight away! The chemical still needs time to soak into the carpet in order to activate, soften, and lift the dirt so that it can be extracted with ease.
The crucial part of the successful cleaning of carpet is taking the place, the pre-spray guarantee better results of the job allowing the Fenix steam cleaning technician to be deserving of their stellar reputation.
Step 6: Steam Cleaning
Hot water extraction is pressurised water dispersed through a commercial-grade machine.
To better explain, it’s essentially like a light version of your standard pressure cleaning machine – just bigger, more powerful, and yes as mentioned above, the cleaner needs to be fully trained to use the equipment.
So how does the machine work?
The extraction process and machine can be broken down into two parts:
- The wand that is used to apply the hot water under pressure
- The machine that removes (sucks up) the water
The stainless-steel wand has either 3 or 2 jets that are spraying the water onto the carpet, loosening and removing the dirt, and killing all the bacteria. The pressure of the extractor (water coming out of the jets) needs to be between 350-450 psi to achieve optimal results (sounds like a high number, but it is needed).
After the jets have sprayed water onto the carpet, the machine part which contains the high-powered vacuums (yes, there are more than one – sometimes two but there can be three) then follows by sucking up all the loosened dirt and debris and any leftover water from your carpet.
It’s vital the vacuum withdraws any extra water to help prevent any nasty smells from forming. You know that wet dog, damp, musty smell? This action takes care of that smell.
As a final note, it’s much better to use a soft brush on the carpet even if we use the hard end to separate chewing gum stains, etc. It’s better than trying to use the wand to separate the carpet fibres.
Types of Carpet
Understanding the different types of carpet fibres is crucial for selecting the right carpet cleaning chemicals and techniques for your needs. Let’s examine the features of each type of carpet:
- Nylon – nylon is one of the most common carpet fibres due to its durability and resilience. It is highly resistant to wear and tear, making it an excellent choice for high-traffic areas in both residential and commercial properties. Proper carpet cleaning enhances its stain resistance, removes grime, and helps maintain its vibrant colours.
- Polyester – polyester carpets offer exceptional softness and a luxurious feel underfoot, making them ideal for bedrooms or living areas. They are also known for their stain resistance, making them a great choice for areas prone to spills or stains.
- Wool – wool carpets exude natural elegance with their softness and luxurious texture. They are known for their durability and natural resistance to stains and flames. Wool fibres provide excellent heat insulation, keeping rooms warm in colder months while offering a cool feel in summer.
- Acrylic – acrylic fibres resemble wool in appearance but come at a lower price point. They offer good resistance to sunlight fading but may not be as durable as other synthetic fibres.
Now that we’ve explored the different types of carpet fibres, let’s delve into the distinction between synthetic and natural fibres, particularly considering maintenance.
Synthetic vs. Natural Fibres
When choosing carpets, you’ll encounter two main categories: synthetic fibres and natural fibres, each with its own unique properties and advantages.
- Synthetic Fibres – these include nylon, polyester, and olefin. Synthetic fibres are man-made and have gained popularity due to their affordability, durability, and stain resistance.
- Natural Fibres – wool is a popular natural fibre choice, offering a more luxurious and environmentally friendly option. Like fine leather, wool is a renewable resource known for its exceptional durability and natural resistance to stains, flames, and odours. Our trained technicians note that while some cleaning products can leave artificial odours, wool’s natural scent is soothing and subtle. Wool also offers excellent insulation properties, which can help regulate indoor temperature and reduce energy costs.
Wand Use
- Day-to-Day Use Wand – these lightweight, high-profile stainless steel wands come in sizes such as 12-inch with two stainless steel jets, ideal for everyday use. They are fitted with triggers to reduce strain during use.
- Stair Tool – featuring a stainless-steel ergonomic double-bend tube with two jets, this tool is designed specifically for cleaning staircases more effectively. It allows for a low-risk cleaning process with high pressures of up to 1200 PSI.
Deodorising While Steam Cleaning
Effective deodorising during steam cleaning can be achieved through two main methods:
- Mixing Deodorising Chemicals – add specialised deodorising chemicals to the hot water in the steam machine. These chemicals often have detergent properties, enhancing the cleaning process.
- Applying Air Fresheners – spray the carpeted areas with a quality air freshener after cleaning each area.
Regardless of the method used, deodorising the carpet after cleaning enhances the overall job, providing both a visual and olfactory sense of cleanliness.
Final Job Check
It’s important to ensure all carpeted areas are thoroughly cleaned. Check the following items before considering the job complete:
- All stains have been removed
- All pet hair has been removed
- All small crumbs and dirt near the edges have been cleared
- The carpet surface is appropriately damp, indicating a deep clean.
- The Fenix mandatory air freshener has been applied
- Photos have been taken to document the finished work
Compulsory Cleaning Products for a Fenix Steam Cleaning Job
The main ingredient in a steam cleaning job is the shampoo. For a shampoo we use “Exit” or “Tannax” or other shampoos that is able to be used on all types of carpet, including wool. The shampoo is used to pre-spray and spot clean basic traffic marks and stains.
To release grease stains, we use “G-Solve” or “Grease Release” which is also great for the removal of chewing gum, paint, grease, ink, nail polish, paint removal, etc. This product are compulsory to maximise blemish removal.
To release proteins and acids we use “Amsolve” which is fantastic for the removal of protein, blood, orange juice, wine, soft drinks, chocolate, milk, most food stains, and even vomit.
To removal the common brown colour caused by moisture or dampness – often found near doors or windows – we use the product called “Browning”.
For the removal coffee, urine, and red wine stains we use the product called “Coffee Break”.
For the removal of rust areas or rust stains we use the product called “Acid Wash” or “Un Duz It”.
Final Checking of Job
As the final step in every cleaning job—regardless of whether it was basic or complex—it is essential to conduct a thorough final inspection. This process ensures the quality of the work and that all agreed-upon tasks have been completed to a high standard.
Begin by reviewing the job specifications, then walk through the entire property with a microfiber cloth, general-purpose spray, and duster. During this check, address any remaining smudges, dust, or cobwebs. Open all cabinets, inspect shelves, and check the wipe of surfaces included in the original scope of work.
Ideally, this step should take place just before mopping, or even better, after the entire cleaning process is complete, to avoid leaving marks on freshly cleaned floors.
This final check typically takes around 10–15 minutes, depending on the size of the property. It also serves as the last opportunity to correct any missed details, take final photos, and ensure the property is presented in pristine condition, ready for the client’s review.
Cash Payment into Bank
Depositing Cash
Please be aware this account is different to the everyday Fenix account numbers.
Cash Account
BSB: 063199
ACC: 1048 1936
Use QR Cardless via the CommBank App
CommBank ATMs now allow cardless deposits using a QR code system enabled through the CommBank app :
Steps
- Open the CommBank app on your registered device.
- Go to Pay → Cardless Withdrawal & Deposit (or similar wording).
- Choose Deposit, enter details (account, amount, description).
- Tap Deposit now if you’re at the ATM (or save for later within 48 hours).
- At the ATM, select “Cardless Withdrawal & Deposit.” A QR code appears.
- Scan the QR code with your app’s camera.
- Confirm the deposit and follow prompts to insert notes, coins, or cheques.
- Complete and collect your receipt .
Limits
- Up to $10,000 per CommBank app user per day.
- Deposit up to 200 notes, 50 cheques, and up to 2 kg of coins on compatible ATMs .
Daily Cardless Deposit Cap
- The max per mobile phone number is $750/day (lower than using a card) .
- If you need to deposit more than $750, you’ll need to use your CommBank debit card at the ATM—card deposits still allow $10,000/day
Other Options (If You Need To Deposit Without Card But Over the Limit)
- CommBank branch counter: Deposit over the counter—staff may ask for ID
Dealing with Damage
There are situations where prompt action is necessary to prevent future issues, and property damage is one of them. Below are the key steps to follow when identifying or encountering damage during a cleaning job:
- Initial Property Inspection:
This is the ideal time to identify and document any pre-existing damage. Carefully inspect the property before starting, compare with the cleaning quote or checklist, and take clear “before” photos of any visible damage. A thorough initial check provides a clear record and protects both the cleaner and the client. - During the Cleaning Process:
Occasionally, additional damage may become apparent while cleaning. In these cases, take detailed photos and write a brief note describing what was found. If the damage is significant or may affect the property’s condition, contact your supervisor immediately so they can assess whether it needs to be reported to the client or real estate agent without delay.
Avoid waiting until the end of the job to report or document damage—delaying this could result in the assumption that the cleaning team is responsible for the issue. - Accidental Damage During Cleaning:
Always prioritize safety and prevention. Before beginning any cleaning tasks, check that fittings such as light fixtures, curtains, blinds, and fan covers are secure. Also, inspect windows for cracks, and note any stains or damage to surfaces such as benches or carpets that may not be fully removable.
If an accident occurs during cleaning, immediately take photos and report the incident. Prompt reporting allows the team to prepare an appropriate response and develop a solution plan, minimizing potential complications for both the cleaner and the client.
T3.3 WORKPLACE HEALTH AND SAFETY
Please now study Fenix Information Document – Workplace Health and Safety.
T3.4 ON THE JOB TRAINING
What is on-the-job training?
On the job training refers to a method of teaching our contractors new skills, knowledge, and competencies while they are earning money and taking contracts.
It is an important part of Fenix teaching you the Fenix way how to manage the client, quoting and standards/expectation of the job.
This type of training is usually performed by a supervisor or a more experienced contractor (on some occasions) who gives advice and explains certain things that are required.
This type of training can be particularly beneficial when it comes to problem solving, client management and also quality control. It also helps the contractor understand different methods to clean quicker whilst keeping the standards up.
T3.5 GETTING THE BEST FROM YOUR iPHONE
Setting-up Your iPhone Link
Video 7 – Setting Up Your iPhone
Taking Payments on Your iPhone
Video 8 – Taking Payments on Your iPhone
IT’S TIME NOW TO COMPLETE THE QUIZ TO TEST YOUR KNOWLEDGE OF THIS PART OF THE TRAINING COURSE.
